Components
Port names and power values for every electrical and industrial component.
31 of 31 components
 Confirmed
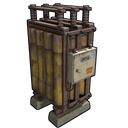
Large Rechargeable Battery
batteries · electric.battery.rechargable.large
- max output
- 100rW
24,000 rWm · in 400rW · out 100rW · 80% efficient
Ports (exact in-game labels)
- ▸ Power In
- ◂ Power Output
- ◂ Fully Charged
Supplies at most 100rW at once, whatever its charge — ten Auto Turrets and no more. Drained flat out it lasts about 4 hours. To hold charge under a full 100rW draw it must be receiving 125rW, because charging is only 80% efficient. Both of those are reasons to consider powering devices straight from generators instead: no output ceiling and no 25% surcharge. Minimum 5s discharge; can be wired in series.
 Confirmed
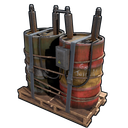
Medium Rechargeable Battery
batteries · electric.battery.rechargable.medium
- max output
- 50rW
9,000 rWm · in 200rW · out 50rW · 80% efficient
Ports (exact in-game labels)
- ▸ Power In
- ◂ Power Output
- ◂ Fully Charged
Supplies at most 50rW at once, whatever its charge. Drained flat out it lasts about 3 hours. To hold charge under a 50rW draw it must be receiving about 63rW, because charging is only 80% efficient.
 Confirmed
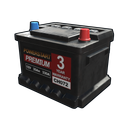
Small Rechargeable Battery
batteries · electric.battery.rechargable.small
- max output
- 15rW
400 rWm · in 60rW · out 15rW · 80% efficient
Ports (exact in-game labels)
- ▸ Power In
- ◂ Power Output
- ◂ Fully Charged
Supplies at most 15rW at once, whatever its charge — that is the real limit, not the capacity. Drained flat out it lasts about 26 minutes. To hold charge under a 15rW draw it must be receiving about 19rW, because charging is only 80% efficient.
 Confirmed
Furnace
containers · furnace
- power
- 0rW
1 adaptor slot, confirmed in game. Burns wood, so an automated build needs a second feed path keeping it stocked with fuel. Ore slot count still unknown.
 Confirmed
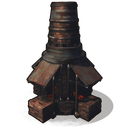
Large Furnace
containers · furnace.large
- power
- 0rW
4 adaptor slots, confirmed in game. Smelts far more at once than a normal furnace but still burns wood. Ore slot count still unknown.
 Confirmed
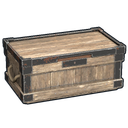
Large Wood Box
containers · box.wooden.large
- power
- 0rW
The default storage box for industrial builds. 4 adaptor slots, confirmed in game.
 Confirmed
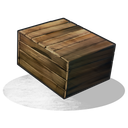
Wood Storage Box
containers · box.wooden
- power
- 0rW
The small wooden box. 2 adaptor slots, confirmed in game — half the large box's 4, which is worth knowing before planning a wide industrial network around small boxes.
 Confirmed
Cable Tunnel
distribution · electric.cabletunnel
- power
- 1rW
Ports (exact in-game labels)
- ▸ Tunnel 1 In
- ▸ Tunnel 2 In
- ▸ Tunnel 3 In
- ▸ Tunnel 4 In
- ◂ Tunnel 1 Out
- ◂ Tunnel 2 Out
- ◂ Tunnel 3 Out
- ◂ Tunnel 4 Out
1rW per USED input, not 1rW flat. Each output = its matching input minus 1. Cost scales with how many tunnels you actually wire.
 Confirmed
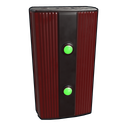
Electrical Branch
distribution · electrical.branch
- power
- 0rW
Ports (exact in-game labels)
- ▸ Power In
- ◂ Branch Out
- ◂ Power Out
RESOLVED 2026-08-12: Branch Out reserves the configured amount FIRST, then Power Out passes the remainder (confirmed in game). The Handbook was right and the second source claiming Power Out fills first was wrong — worth remembering when weighing those two sources against each other in future.
 Confirmed
Root Combiner
distribution · electrical.combiner
- power
- 0rW
Ports (exact in-game labels)
- ▸ Root Power 1
- ▸ Root Power 2
- ◂ Combined Power Out
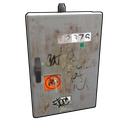
Sums both inputs and prevents power looping. 0rW — sources claiming 1rW are STALE, not wrong: combiners, branches and splitters all used to cost 1rW and were changed to 0. Chains cap at 15 combiners; beyond that it short-circuits. CONFIRMED IN GAME, and it is the important part: a combiner draws the FULL load from EVERY input, not a share of it. Two large batteries feeding 10 Auto Turrets (100rW) drain at 100rW EACH — 200rW of stored energy spent to deliver 100rW. Combining does raise the ceiling past one battery's 100rW (11 turrets ran fine), but it halves your runtime to do it. Stack that on the 80% charging efficiency and sustaining 100rW from a combined pair needs roughly 250rW of generation.
 Confirmed
Splitter
distribution · electric.splitter
- power
- 0rW
Ports (exact in-game labels)
- ▸ Power In
- ◂ Power Out 1
- ◂ Power Out 2
- ◂ Power Out 3
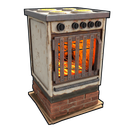
Input power divided evenly across ACTIVE outputs, distributed sequentially from Output 1. RESOLVED in game: 'active' means A WIRE IS ATTACHED, not that anything downstream is drawing — a switch left OFF still claims its full share. So an unused-but-wired output silently costs you a third of the circuit. To reclaim that power you must physically disconnect the wire; switching the device off is not enough. This is a real base-breaking gotcha and no guide site documents it.
 Confirmed
Electric Furnace
industrial · electric.furnace
- power
- 3rW
Ports (exact in-game labels)
- ▸ Power In
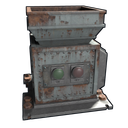
3rW confirmed in game. It has ONLY a Power In port and nothing else — it needs a Storage Adaptor to join an industrial network, exactly like any other container. The auto-smelter models it that way.
 Assumed
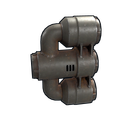
Hopper
industrial · hopper
- power
- unknown
Ports (exact in-game labels)
- ▸ Industrial In
- ◂ Industrial Out
- ▸ Power In
Ports confirmed in game: Power In plus Industrial In/Out. Power draw and behaviour still unknown, and DELIBERATELY NOT PURSUED — hoppers are essentially never used in practice, so this is not worth sandbox time. Revisit only if a build calls for one.
 Confirmed
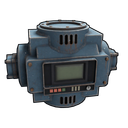
Industrial Combiner
industrial · industrial.combiner
power — takes no power
Ports (exact in-game labels)
- ▸ Input 1
- ▸ Input 2
- ▸ Input 3
- ◂ Output
3:1, and the port labels above are confirmed correct in game. This is the branching factor that makes depth-32 a non-issue for branched topologies. Takes NO power — shows as '—', not 0rW.
 Confirmed
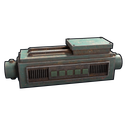
Industrial Conveyor
industrial · industrial.conveyor
- power
- 1rW
Ports (exact in-game labels)
- ▸ Industrial In
- ◂ Industrial Out
- ▸ Power In
- ◂ Power Out
- ▸ Turn On
- ▸ Turn Off
- ◂ Filter Pass
- ◂ Filter Fail
Fully confirmed in game. Moves loot only when powered; strictly ONE-DIRECTIONAL (cannot move items from its output side back into its input); no filter = moves everything; 1rW. All 8 ports confirmed: Power Out chains power on to the next conveyor, Turn On/Turn Off gate the whole thing from a circuit, and Filter Pass/Filter Fail are ELECTRICAL outputs — they fire a signal depending on whether an item matched the filter, so item flow can drive logic (alarms, counters, lights). They do NOT route items; a conveyor still has exactly one item output.
 Confirmed
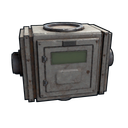
Industrial Crafter
industrial · industrial.crafter
- power
- 1rW
Ports (exact in-game labels)
- ▸ Industrial In
- ◂ Industrial Out
- ▸ Power In
- ▸ Blueprint In
- ◂ Blueprint Out
- ▸ Turn On
- ▸ Turn Off
Fully confirmed in game. 1rW — Falcon Rust's claim of 5rW is wrong, and that source publishes fabricated mechanics generally. All 7 ports confirmed: item in/out and power in, plus Blueprint In/Out which are PIPE connections (blueprints are piped in and back out separately from the items), and Turn On/Turn Off to gate it from a circuit. server.industrialcrafterfrequency default 5s.
 Confirmed
Industrial Splitter
industrial · industrial.splitter
power — takes no power
Ports (exact in-game labels)
- ▸ Input
- ◂ Output 1
- ◂ Output 2
- ◂ Output 3
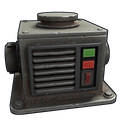
1:3, port labels confirmed, takes NO power. It is a PASSIVE PIPE JUNCTION with no logic of its own — it simply lets one pipe reach three places instead of one. Items arriving are shoved out across the connected outputs roughly equally and not in a strictly deterministic order. Nothing moves unless a conveyor somewhere in the run is powered and switched on; the splitter itself never drives anything. Worked example: box → adaptor → unfiltered conveyor → splitter → three boxes results in everything put in the first box spreading itself across the three. Note this is the OPPOSITE of the electrical splitter, which divides a quantity; this one distributes discrete items.
 Confirmed
Storage Adaptor
industrial · storageadaptor
- power
- 1rW
Ports (exact in-game labels)
- ▸ Industrial In
- ◂ Industrial Out
- ▸ Power In
- ◂ Passthrough
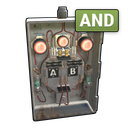
Deploys on a container to give it industrial ports. All four ports confirmed in game: Industrial In/Out, Power In and a power Passthrough. CHAINABLE two ways — the industrial side chains so a run of boxes presents to the conveyor as one source, and the Passthrough carries power on to the next adaptor, so a row of sorting boxes can be fed from a single wire rather than one wire each. Power is OPTIONAL and costs 1rW. Powering it only adds a Sort button to the box, which tidies the contents — stacks like items together and orders them. It does NOT route or filter anything; it is a convenience, not a mechanic. Because unpowered is the normal case, the power input is marked optional so derived totals don't charge it. Adaptor slots per container (confirmed in game): Furnace 1, Electric Furnace 1, Large Furnace 4, Large Wood Box 4, Wood Storage Box 2, Locker 3, Tool Cupboard 2. Coffin/Drop Box/Fridge still unknown.
 Confirmed
AND Switch
logic · electric.andswitch
- power
- 0rW
Ports (exact in-game labels)
- ▸ Input A
- ▸ Input B
- ◂ Power Out
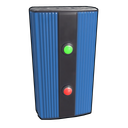
Both inputs required. Only the HIGHER input's power passes through — not the sum, and not the lower.
 Confirmed
Blocker
logic · electric.blocker
- power
- 0rW
Ports (exact in-game labels)
- ▸ Power In
- ▸ Block Passthrough
- ◂ Power Out
NOT gate. Any power into Block Passthrough stops flow to Power Out.
 Confirmed
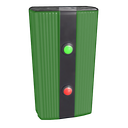
Counter
logic · electric.counter
- power
- unknown
Ports (exact in-game labels)
- ▸ Power In
- ▸ Increment
- ▸ Decrement
- ▸ Reset Counter
- ◂ Power Out
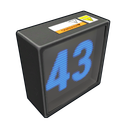
Purely electrical — no industrial ports. Power In and Power Out plus three signal inputs: Increment, Decrement and Reset Counter. Ports confirmed in game; power draw not measured. Passes power through rather than generating its own, and the display doubles as a readout, which makes it the natural instrument for measuring what a circuit is actually delivering.
 Confirmed
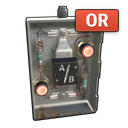
Memory Cell
logic · electrical.memorycell
- power
- 0rW
Ports (exact in-game labels)
- ▸ Power In
- ▸ Set
- ▸ Reset
- ▸ Toggle
- ◂ Output
- ◂ Inverted Output
1-bit latch. MUST be powered for side inputs to change state. Output is on the right, Inverted Output on the left; default output when powered on is Inverted. Open question Q4: is the in-game label 'Reset' or 'Clear'?
 Confirmed
OR Switch
logic · electric.orswitch
- power
- 0rW
Ports (exact in-game labels)
- ▸ Input A
- ▸ Input B
- ◂ Power Out
Higher input passes. On a tie, Input A wins.
 Confirmed
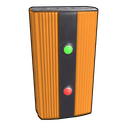
RAND Switch
logic · electric.random.switch
- power
- 0rW
Ports (exact in-game labels)
- ▸ Power In
- ▸ Set
- ▸ Reset
- ◂ Power Out
50% chance of state change on Set. Reset forces off.
 Confirmed
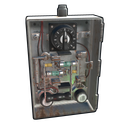
Timer
logic · electric.timer
- power
- 0rW
Ports (exact in-game labels)
- ▸ Electric Input
- ▸ Toggle On
- ◂ Power Out
 Confirmed
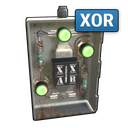
XOR Switch
logic · electric.xorswitch
- power
- 0rW
Ports (exact in-game labels)
- ▸ Input A
- ▸ Input B
- ◂ Power Out
Exactly one input. Both powered = blocked entirely.
 Confirmed
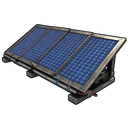
Large Solar Panel
power sources · electric.solarpanel.large
- output
- 20rW
Ports (exact in-game labels)
- ◂ Power Out
Peak output 20rW, confirmed in game. Falls to 0 at night, so anything that must stay on needs battery backup. Port label still inferred.
 Confirmed
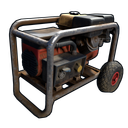
Small Generator
power sources · electric.fuelgenerator.small
- output
- 40rW
Ports (exact in-game labels)
- ◂ Power Out
40rW comes from the game's OWN item description in Bundles/items/electric.fuelgenerator.small.json — Facepunch's text, not a guide site, so it is authoritative. Burns Low Grade Fuel; burn rate still unknown. Port label inferred.
 Unverified
Test Generator
power sources · electric.generator.small
- power
- 0rW
Ports (exact in-game labels)
- ◂ Power Out
Must be spawned in — admin/creative only, not craftable. Output figure not sourced. Useful for the sandbox as an infinite source but should be visibly flagged as non-survival.
 Confirmed
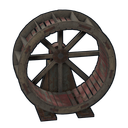
Water Wheel
power sources · generator.water
- output
- 30rW
Ports (exact in-game labels)
- ◂ Power Out
30rW confirmed in game, doubling to 60rW while a player physically runs inside it. Plan around 30 — the 60 is a burst you can't sustain, so it is useful for a one-off task rather than as a base supply. Steadier than solar, which drops to 0 at night. Port label still inferred.
 Unverified
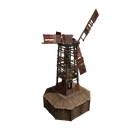
Wind Turbine
power sources · generator.wind.scrap
- output
- varies
Ports (exact in-game labels)
- ◂ Power Out
Confirmed in game: output depends on the height it is placed at, and there is no single max figure — so the 'up to 150' seen on low-trust sources is not recorded. The height-to-output CURVE is the genuinely valuable missing fact: every site says output depends on height, nobody publishes the numbers. Measuring it at a few known heights would be the single highest-value piece of original data this site could hold.