Auto Smelter (self-topping furnaces)
Ore in, metal out, with each furnace kept topped up.
Ore goes in one side, metal comes out the other, and the furnaces top themselves back up as they burn down. It is the build that pays for itself fastest, and it rests on one mechanic that is not obvious from the interface.
Before you start: what the filter numbers actually mean
A conveyor's filter has a min and a max. They are not a transfer size. They are a target level for the destination.
Set a filter to max 500 metal ore and the conveyor keeps each furnace sitting at 500, topping it back up as it smelts. Set it to 0 and the conveyor moves everything it can.
Get this the wrong way round and you empty your entire ore box into two furnaces in one go. It is the single most common mistake in this build.
You also need two conveyors, not one. A conveyor moves items from its Industrial In to its Industrial Out and never the other way, so one pushes ore into the furnaces and a second pulls the smelted output back out.
Every furnace needs its own Storage Adaptor — a furnace with no adaptor has no pipe connections. That cost scales one for one with furnace count and is the one people forget.
The shape
ore box ──▶ FEED conveyor ──▶ furnace 1 ──▶ furnace 2 ──▶ … ──▶ COLLECT conveyor ──▶ output boxThe furnaces chain one to the next, adaptor to adaptor. No splitters at all. This is how it is normally built and it is what was confirmed in game.
Step 1 — ore box and feed conveyor
Adaptor on the ore box. Pipe from that adaptor into the feed conveyor's Industrial In.
Step 2 — chain the furnaces
Adaptor on every furnace. Pipe the feed conveyor's Industrial Out into the first furnace's adaptor, then that adaptor's output into the next furnace's adaptor, and so on down the line.
Step 3 — collect conveyor and output box
The last furnace's adaptor output goes into the collect conveyor's Industrial In, and the collect conveyor's Industrial Out into the output box's adaptor.
Step 4 — power
Electric furnaces are 3rW each, conveyors 1rW each. Two furnaces and two conveyors is 8rW.
Wood-burning furnaces need no power themselves, but they do need wood — see below.
Step 5 — filters
Feed conveyor: metal ore, with a max that sets how full each furnace stays. Start around 100–200. Lower keeps ore available in your box; higher means fewer top-ups but that ore is committed and sat in a furnace.
Collect conveyor: metal fragments, min and max 0 so it takes everything.
Filter the collect conveyor or it pulls unsmelted ore straight back out of the furnace. This is the second most common mistake.
Wood versus electric
Electric furnaces take ore in and give metal back. Nothing else. They cost 3rW each.
Regular and large furnaces burn wood, so the feed conveyor has to carry wood as well as ore, and the collect side brings charcoal back along with the smelted output. Same pipework either way — just more entries in both filters, and no power draw from the furnaces themselves.
When chaining stops working
Chaining puts the last furnace as many hops from the conveyor as there are furnaces, and Rust caps pipe depth at 32. Past that limit the furthest furnace silently stops being reachable — no error, no warning, it just stops being fed.
Around 30 chained furnaces is the practical ceiling. Beyond that, fan out with splitters instead: a splitter tree keeps every furnace roughly 11 hops out no matter how many you have. The designer below switches over on its own when you cross the limit, and shows you the measured depth either way.
Watch out
- Every furnace needs its own adaptor. Scales one for one.
- Filter the collect conveyor, or it undoes the smelting.
- Scale by adding furnaces, not conveyors. Smelting is far slower than moving — two conveyors in series is 1× throughput, and that is already more than enough.
Parts list
| Component | Qty | Draw | Data |
|---|---|---|---|
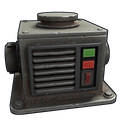 Storage Adaptor Storage Adaptor | 4 | 1rW | Confirmed |
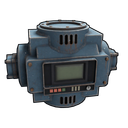 Industrial Conveyor Industrial Conveyor | 2 | 1rW | Confirmed |
Quantities are for the layout shown. Change the size in the designer below and the parts list changes with it.
Watch someone build it
Other people’s videos. Not ours, and not checked against the current patch — but watching the pieces go down is faster than reading about it.
Design your own
Power: 8rW external · 6 parts
Chaining uses no splitters and reaches depth 4. Splitters would cost 1 but bring depth to 5. Both figures are measured off the built graph, not estimated.